How to edit a photo with text prompts
Describe a change in plain words and get it as a new layer: golden hour light, a new object, a bigger canvas. A step by step guide to AI photo editing.

Some photo edits are hard to do by hand and easy to describe. "Make it golden hour." "Put a small vase with a yellow tulip on the table." "Show more of the room above and below." Editing with text prompts lets you say exactly that and get a result you can keep, compare or throw away.
This guide shows how to do it in DesignBat, the design and photo app in OfficeBats, with a sample cafe photo. You will make a whole photo change, change only one area, grow the canvas, and keep track of every version so you can go back to any of them.
What you need
- A photo. PNG, JPG, WebP, TIFF and PSD files all open in the photo editor.
- A free OfficeBats account. AI photo edits use credits from your shared OfficeBats AI wallet, and you need to be signed in.
- A clear idea of the change. The more specific the words, the closer the first result.
Step 1: open the photo editor
From Your designs, choose Edit a photo, then Open a file or From your Drive. If the photo is part of a design, select it and press Edit photo in the toolbar instead.
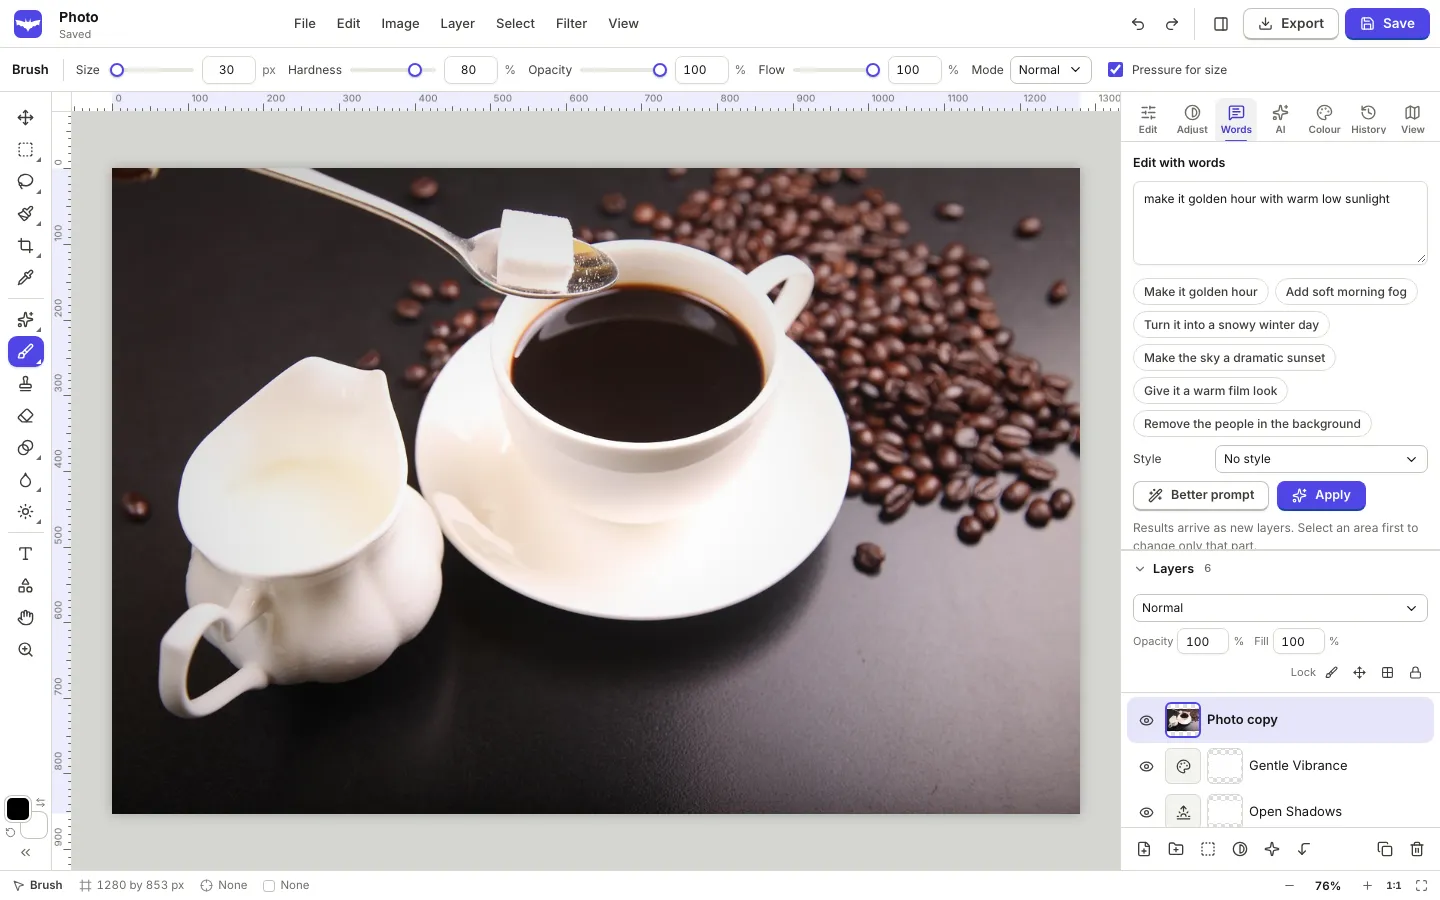
On the right of the editor are tabs for Properties, Adjust, Edit with words, AI designer and more. Open Edit with words.
Step 2: describe the change
Type what you want in the box. The placeholder gives the idea: "Describe the change. For example: make it golden hour, add a small boat on the lake". Under the box are ideas you can click to fill it in, such as Make it golden hour, Add soft morning fog, Make the sky a dramatic sunset and Remove the people in the background.
Good prompts have three parts:
- What changes: the light, the season, an object, the colours.
- How it should look: warm, soft, dramatic, subtle.
- What stays the same, if it matters: "keep the cup exactly as it is".
Optionally pick a Style: No style, Photo, Cinematic, Illustration, Watercolour, 3D render, Anime, Sketch, Vintage film or Minimal. For a realistic edit, leave it on No style or Photo.
If your words are vague, press Better prompt. DesignBat suggests a few fuller descriptions in a Pick a prompt list, and the one you choose goes into the box.
Step 3: apply it
Press Apply. After a short wait the result appears as a new layer named after your prompt. Here is the sample photo with "make it golden hour with warm low sunlight":
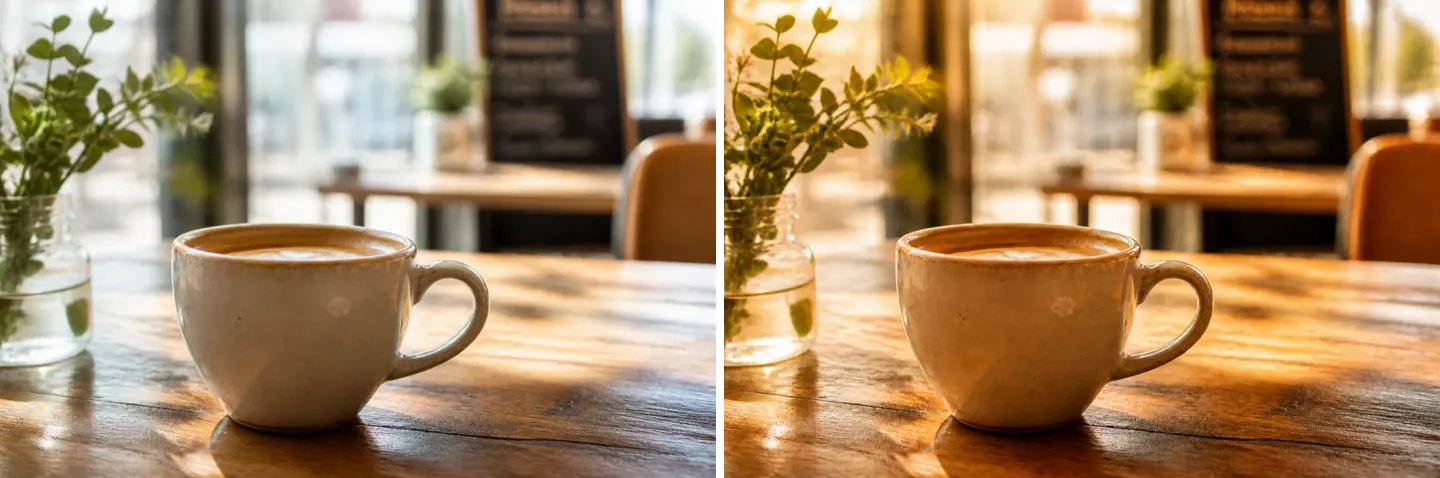
Look at it closely. If it is nearly right, try again with a small change to the words rather than starting over. If it is wrong, delete the layer or hide it with the eye in the Layers panel.
Step 4: change only one part
To keep most of the photo untouched, select an area first. Use the rectangle or lasso tools, Select, then Subject, or Select by description, where you type what to select, such as "the sky" or "the red car". Then use the buttons under With the selection:
| Button | What it does | Example prompt |
|---|---|---|
| Remove | Takes the selected thing out and fills in what was behind it | (no prompt needed) |
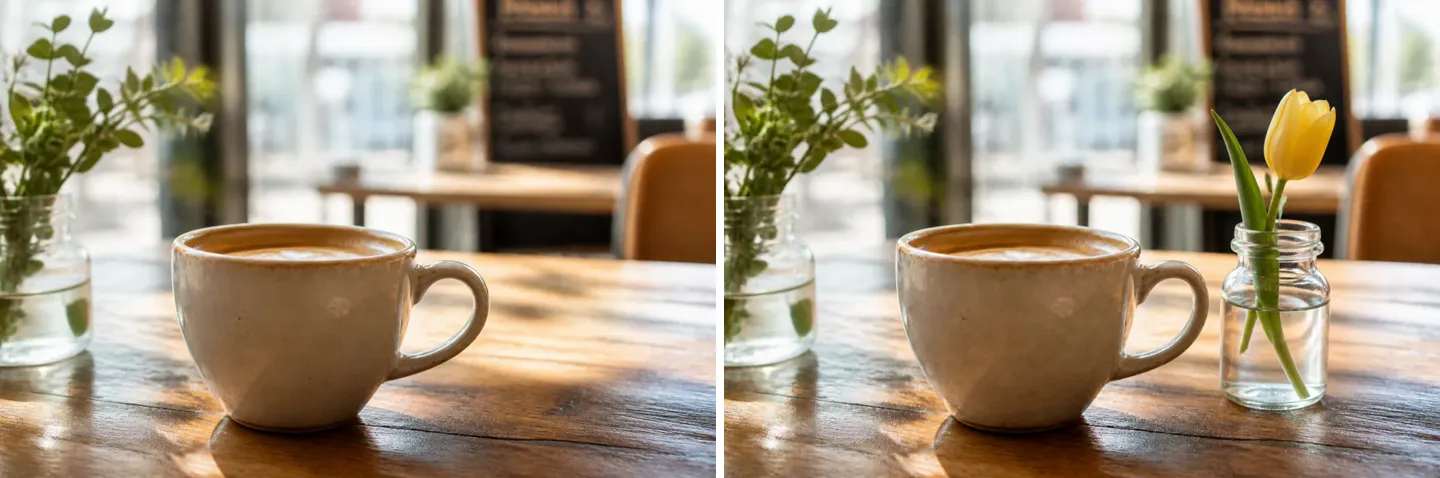
| Fill | Adds something new in the selected area | a small glass vase with a single yellow tulip |
| Replace | Swaps the selected thing for something else | a blue ceramic mug |
The selection becomes the mask of the result layer, softened at the edge, so the change blends into the photo. This is the sample with a selection on the table and the fill prompt from the table above:
Step 5: grow the canvas with Expand
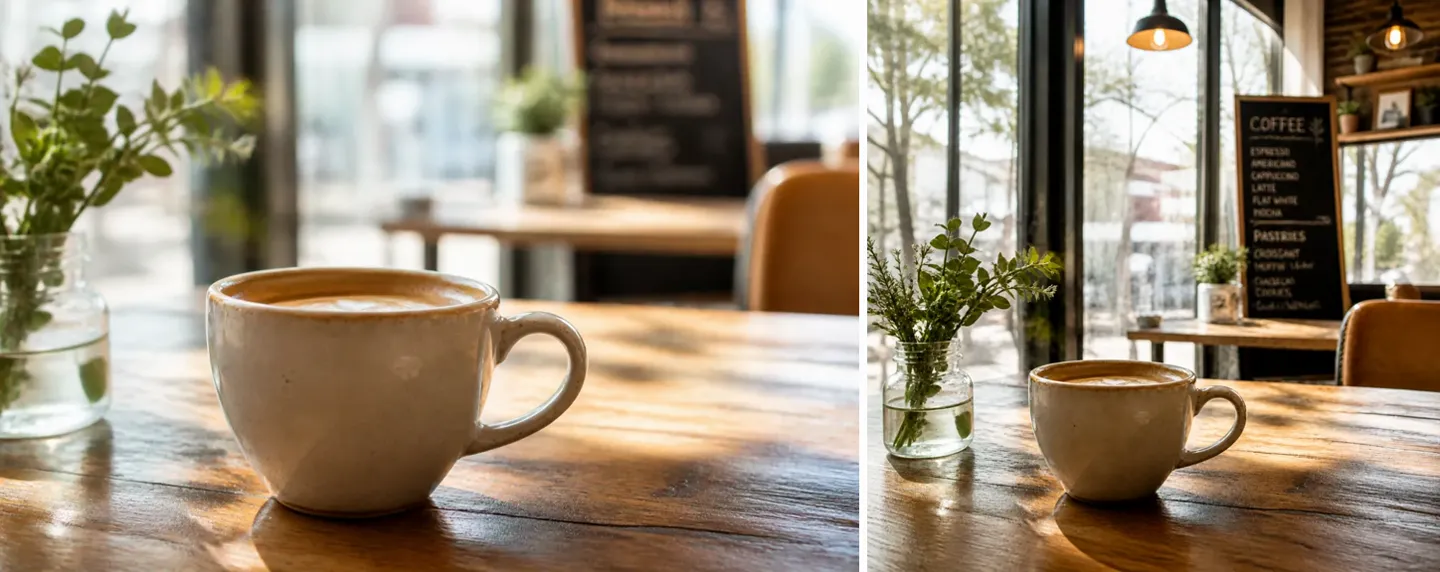
Need a wider shot for a banner, or a tall one for a story? Under Expand, choose a direction (Left, Right, Up, Down or All sides) or a shape (To 16:9, To 9:16 or To square). DesignBat makes the canvas bigger and fills the new area to continue the scene. Anything you have typed in the prompt box guides what goes there, for example "more of the cafe interior above and below".
Step 6: compare and branch
Every edit you make is listed under Your edits at the bottom of the panel, with a thumbnail, the prompt and the time. For each step you can:
- Before and after: opens the photo before and after that step, with a slider to wipe between them.
- Branch from here: goes back to that step and hides the edits after it. Your next edit starts a new branch from there, and the old branch is still in the list.
Branching is useful when you are not sure which direction you like. Try golden hour, then go back and try fog from the same starting point, and compare the two.
More whole photo tools
The Whole photo buttons change the entire image without a selection:
- Variations gives up to four options to choose from (Option A to D).
- Upscale makes a larger, sharper version.
- Restore cleans up old or damaged photos, and Colourise adds colour to black and white ones.
- Relight changes the lighting from your description.
- Style restyles the photo, optionally from Reference images you add.
- Product scene places a product photo in a scene you describe.
- Retouch portrait smooths and evens out skin with a light touch.
- Change text rewrites words that appear in the photo.
- Compose with references combines your photo with up to six reference images.
For bigger jobs, the AI designer tab works step by step in your layers from one description, such as "warm it up and add a soft vignette". Every step it takes can be undone, and you can stop it at any time.
Credits and plans
AI photo edits use your shared OfficeBats AI credits. The Free plan includes 10 AI actions a day and Pro includes 300, paid with credits from the same wallet every Bats app uses. On device tools in the same panel, such as Remove and Blur under Background, run in your browser and use no credits. See AI credits explained and pricing.
Tips for better prompt edits
- One change at a time. "Golden hour" then "add a vase" works better than both in one prompt.
- Select when you can. A selection keeps the rest of the photo exactly as it was.
- Name the light and the mood. "Warm low sunlight from the left" beats "nicer".
- Keep the original. Never merge result layers until you are happy with them.
- Check the details. Look at hands, text and edges at 100 percent before you use the photo.
When the photo is ready, choose File, then Export, or press Done, back to the design if you came from a design. Exports are saved to your Drive too. Next, try removing the background from a photo or turning a photo into editable layers.
Frequently asked questions
Can I edit a photo just by describing the change?
Yes. In the DesignBat photo editor, open Edit with words, type the change, such as "make it golden hour", and press Apply. The result appears as a new layer above your photo.
Will a prompt edit overwrite my original photo?
No. Each result is a new layer, so your original stays underneath. Hide or delete the layer to undo it, or use Before and after to compare.
How do I change only part of a photo?
Select the area first with a selection tool, Select, then Subject, or Select by description. Then use Remove, Fill or Replace under With the selection. Only the selected area changes.
Does editing with words cost anything?
AI photo edits use credits from your OfficeBats AI wallet. The Free plan includes 10 AI actions a day and Pro includes 300. On device tools such as background Remove and Blur use no credits.
Can I go back to an earlier version and try something else?
Yes. Every edit is listed under Your edits. Press Branch from here on any step to go back to it and start a new branch, while the other edits stay in the list.