How to build a payment form that people actually complete
Take payments for bookings, deposits, classes and orders with a simple online form. Practical design tips, setup steps and mistakes that make people quit.
A payment form has one job: get someone from "yes, I want this" to "paid" before they change their mind. Every extra field, confusing price or surprise at the last step is a chance for them to close the tab.
The good news is that the fixes are mostly common sense, applied with discipline. This guide covers how to plan a payment form, how to set one up in FormsBat, and the design choices that help people finish.
When a payment form is the right tool
A form with a payment question works well when you are collecting information and money at the same time. Some typical examples:
- A yoga studio taking registrations for a six week course
- A photographer collecting a booking deposit along with the date and location
- A school club collecting trip fees and a parent's emergency contact details
- A small charity running event sign ups with a ticket price
- A consultant taking payment for a paid discovery session
If you are billing a client for work already done, an invoice is usually the better fit, because it tracks what is owed and paid over time. See get paid faster with online invoice payments for that side of things. A payment form shines when the money and the details arrive together, from people you may not have met yet.
How payments work in FormsBat
FormsBat has a payment question type. Payments go through Stripe Connect into your own Stripe account, so the money lands with you and the payment records live in your Stripe dashboard. There is no FormsBat platform fee by default; you pay Stripe's usual processing fees.
A few things to know up front:
- Stripe is the payment provider for forms. Other payment providers are not available in FormsBat.
- You need your own Stripe account to connect.
- Payment is one question in the form, so you can collect everything else you need on the same page or earlier pages.
Plan the form before you build it
Ten minutes of planning saves you from a form that asks for everything and converts nobody.
- Write down what you truly need. For a class booking that might be name, email, which class, and any health notes. That is it. Billing details are handled at the payment step.
- Decide what is optional. If you would like to know how they heard about you, make it optional or leave it out. Required questions that do not serve the purchase are where people drop off.
- Decide the price structure. One fixed price is the easiest to understand. If you have options (a single class or a full term), keep the number of choices small and the differences clear.
- Decide what happens after payment. A thank you message with next steps, or a redirect to a page with joining instructions. People who just paid want reassurance immediately.
Build it step by step
- Sign in at formsbat.com with your OfficeBats account, or create a free one.
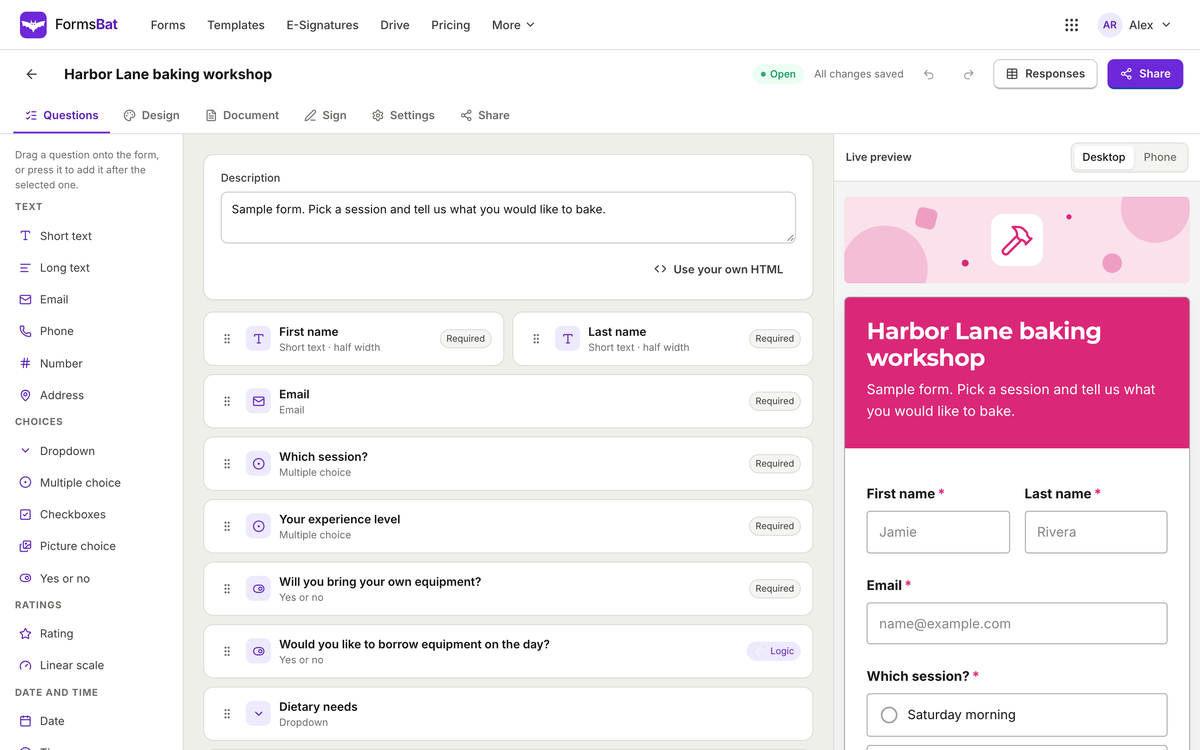
- Start from a template or a description. FormsBat has 119 templates in 13 categories, or you can describe the form in a sentence and let AI create a first draft (this uses AI credits).
- Add your questions. Use the right type for each answer: email for email addresses, phone for phone numbers, date for dates, dropdown or multiple choice for fixed options. The right type gives people the right keyboard on their phone and catches typos early.
- Add the payment question and connect your Stripe account.
- Add validation where it helps, such as a number range for the number of tickets.
- Pick a theme. Choose one of 8 themes and set your accent colour, fonts and logo so the form looks like it belongs to you. A familiar look reassures people who are about to enter card details.
- Set the finish. Add a thank you message or a redirect, and turn on the owner notification email so you know when someone pays.
- Test it yourself from start to finish on a phone before sharing it.
Useful settings for paid forms
| Setting | Why it helps |
|---|---|
| Response limit | Stop taking bookings when a class or event is full |
| Close date | Stop registrations automatically at a deadline |
| Respondent copy | Send people a copy of their answers by email |
| One response per person or email | Prevent accidental duplicate sign ups |
| Hidden field | Record which campaign or page someone came from |
Design choices that help people finish
Keep it short, or split it up
Every question is a small cost. If you need more than a handful, use page breaks to split the form into steps. FormsBat shows a progress bar on multi page forms, so people can see how close they are to the end.
Use logic to hide what does not apply
Conditional logic shows or hides questions and pages based on earlier answers. If someone picks "Online session", hide the address questions. If they say they have no dietary needs, skip the follow up. People only see what applies to them, and the form feels shorter than it is.
Ask for the payment last
Collect the details first, then take payment. Someone who has already entered their name and chosen a class is invested. Asking for a card on the first screen, before they have committed, tends to scare people off.
Make the form easy to reach
Share it where your customers already are:
- A link in emails and social posts
- An embed on your website (the embed resizes itself to fit)
- A QR code on a printed flyer, poster or a sign at the front desk
- A custom domain so the link looks like part of your business (1 on Pro, 5 on Business)
Keep spam out without adding friction
FormsBat uses a honeypot, a minimum fill time and rate limiting to block bots, with an optional captcha if you need more. Start without the captcha; add it only if spam becomes a problem, because every extra step costs some real people too.
After people pay
Responses arrive in a searchable table you can export to CSV or Excel. Charts per question and responses per day help you see how sign ups are going.
You can also turn each response into a document, such as a booking confirmation or a signed agreement, and save it to Drive automatically. That is covered in forms that finish the paperwork.
Where to start
- List only the information you need, and show the price up front.
- Build the form in FormsBat, add the payment question and connect your Stripe account.
- Test it on your phone, then share the link, embed or QR code.
Every plan includes unlimited forms. The Free plan covers 1,000 responses a month, and Pro raises that to 10,000 and removes the "Made with FormsBat" badge.