How to create a professional invoice (with a checklist)
What a professional invoice needs, how to word it, which mistakes slow payment, and a checklist you can run before every invoice you send out.
An invoice is often the last thing a client sees from you on a job, and it is the one document that decides when you get paid. A clear invoice gets approved and paid without questions. A vague one sits in someone's inbox while they wait to ask what "Services, $2,400" actually covered.
This guide walks through what a professional invoice includes, how to word it, the small mistakes that cause delays, and a checklist you can run every time.
What every invoice needs
Rules differ by country, and if you charge sales tax or VAT your tax authority may require specific details. Check your local requirements. Beyond that, nearly every good invoice has the same building blocks.
The basics
- Your business details. Business name, address, email and phone. If you are registered for tax, your tax number.
- The client's details. The legal name of the company you are billing, the contact person, and their billing address. Ask for this when the job starts, not when you invoice.
- A unique invoice number. Use a simple sequence (INV-0041, INV-0042) and never reuse a number. It makes finding, referencing and reconciling invoices far easier.
- The invoice date and the due date. Write the due date as an actual date ("Due October 8, 2026"), not only as a term. People act on dates.
- Line items. Each item with a description, quantity, rate and amount.
- Subtotal, tax and total. Show tax as its own line with the rate used.
- Payment instructions. How to pay, where to pay, and what reference to include.
The details that make it look professional
- A purchase order (PO) number if the client gave you one. Many larger companies cannot pay an invoice without it.
- Your logo and a consistent layout, so the invoice is recognizably yours.
- A short note thanking them for the work, or mentioning the next step.
- Your payment terms and any late fee policy, stated plainly.
Write line items people can approve
The person paying your invoice is often not the person who hired you. Someone in accounts has to match it to a budget, and they will only approve what they understand.
Compare these two lines:
| Vague | Clear |
|---|---|
| Design work | Homepage and 3 inner page designs, two rounds of revisions |
| Consulting | Strategy workshop, 4 hours on September 2, at $150 per hour |
| Expenses | Printing of 200 brochures (receipt attached) |
The clear version answers the questions before anyone asks them. A few habits help:
- Use the client's own language from the quote or contract, so line items match what they agreed to.
- Split work into meaningful pieces rather than one lump sum.
- For hourly work, show dates, hours and the rate.
- For reimbursable costs, say what they were and attach receipts where you can.
Payment terms that are clear and fair
Payment terms tell the client when the invoice is due and what happens if it is late. Common choices include "due on receipt", "Net 15" (due 15 days after the invoice date) and "Net 30". Pick what fits your work and your cash flow, and agree it before the job starts.
A few practical points:
- State terms in plain words as well as the shorthand: "Net 15: payment due within 15 days, by September 23, 2026."
- Agree deposits upfront for larger projects. Invoicing part of the fee at the start is common and reasonable.
- Mention late fees only if you will apply them, and only if they are allowed where you work.
- Make paying easy. The fewer steps between reading the invoice and paying it, the sooner you are paid. There is more on this in our guide to getting paid faster.
Common mistakes that delay payment
Most late payments are not bad intent. They are small frictions that push your invoice down someone's list.
- Sending to the wrong person. Ask who handles invoices and send it to them, with your contact copied.
- Missing PO or reference numbers. If the client's system needs one, the invoice cannot move without it.
- Math that does not add up. Hand calculated totals and tax are an easy place to slip.
- Inconsistent numbering. Duplicate or skipped numbers cause confusion for both of you at tax time.
- No due date. "Payment terms: 30 days" leaves people guessing from which day.
- Invoicing late. The longer you wait after finishing, the less urgent it feels to the client. Invoice as soon as the work or milestone is done.
Creating invoices in BooksBat
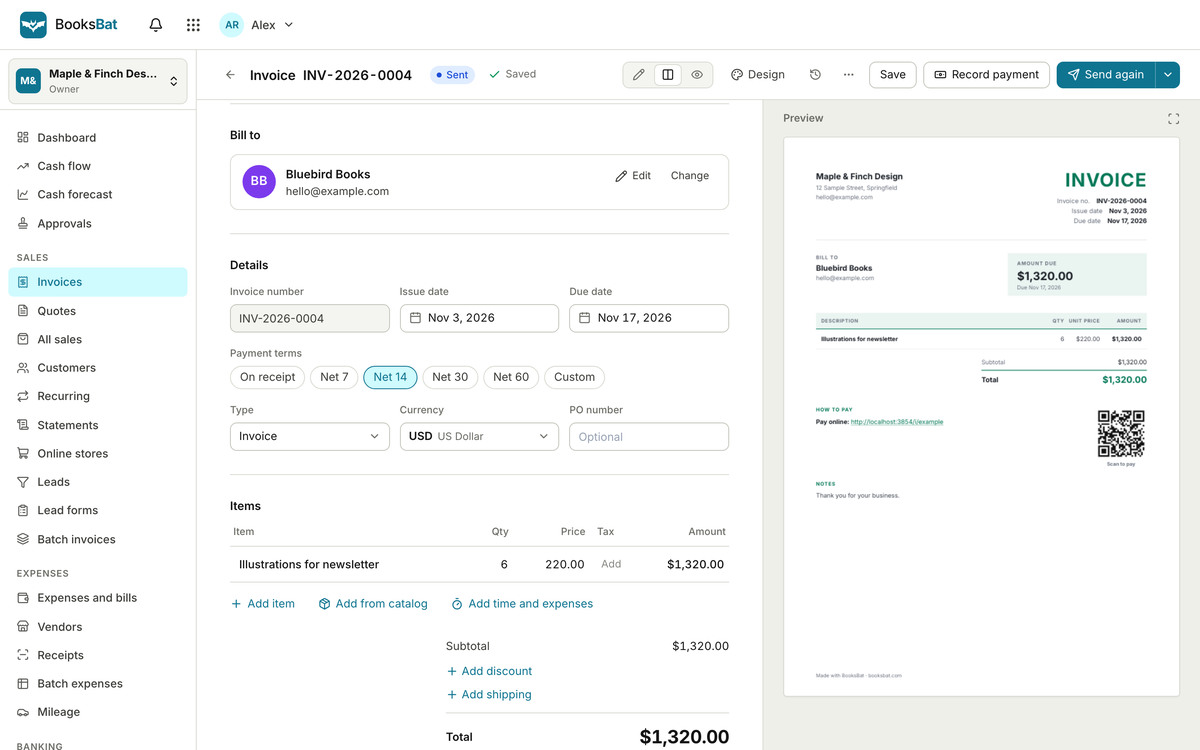
You can build a decent invoice in a word processor, but you end up retyping client details, calculating tax by hand and keeping your own list of who has paid. BooksBat handles those parts for you, and keeps every invoice connected to your books.
Pick a design and start
BooksBat has 8 invoice designs and about 67 industry invoice templates, so a photographer, a contractor or a consultant can start from layouts that suit their work. You can export any invoice as a PDF or a Word file.
If you only need a one off invoice, the free invoice generator page on booksbat.com works without an account.
Let AI draft it, then check it
If the details of a job live in an email thread or your own notes, you can paste them in and let BooksBat's AI draft the invoice from them. Treat the draft as a starting point: read every line, check quantities and rates, and confirm the client details before you send.
Track what happens next
Each invoice has a status: draft, sent, viewed, partially paid, paid, overdue or void. That tells you at a glance whether a client has opened your invoice, so a follow up can be specific rather than awkward. You can also:
- Send quotes or estimates that customers accept online before the work starts.
- Set up recurring invoices, from weekly to yearly, for retainers and subscriptions.
- Turn on automatic reminders, so you do not have to chase by hand.
- Issue credit notes and refunds, and send customer statements.
On the Free plan you can have 5 customers and send 5 invoices and 5 quotes a month. Pro removes those limits; see pricing for the details. If you want to see how quotes, invoices and payments link together across a whole job, read small business paperwork from quote to payment.
The pre-send checklist
Run through this before every invoice goes out:
- Client's legal name, contact and billing address are correct.
- Invoice number is unique and follows your sequence.
- Invoice date and an actual due date are shown.
- PO or reference number is included, if the client uses one.
- Each line item says what was done, with quantity and rate.
- Subtotal, tax rate, tax amount and total are correct.
- Payment terms are written in plain words.
- Payment instructions are clear, with a way to pay online if you offer one.
- Receipts are attached for any reimbursable expenses.
- It is going to the person who actually processes invoices.
The short version
A professional invoice is clear more than it is fancy. Use a unique number, a real due date, line items the client already agreed to, and simple ways to pay. Send it as soon as the work is done, to the person who pays it, and keep track of its status so you know when to follow up.
If you want invoices that number themselves, calculate tax and show you who has viewed them, you can create a free account and try BooksBat with your next job.